Thursday, April 28, 2011

Let Go and Let God Canvas

The other day when it was super nice out, I spray painted a 16" wide by 20" tall canvas Rustoleum's Harbor Blue. I gave it 2 real good coats. Between the glorious sun and the warm wind, the canvas was kind of a paint hog. Harbor blue, what a fun color.  I also rubbed Walnut Distress Ink over it to give it an aged look. BUT...I didn't have a plan for it until today. =)

My Mom has to be one of the strongest people I have ever met. Throughout my life, she has always been my constant. It didn't matter what, where, when or why. She has ALWAYS been there. And through the years~we have become very close. I am so truly blessed that God chose her to be my Mom. I got pretty lucky!

WE have been blessed. And sometimes, I forget that. Sometimes, I get so wrapped up in ALL things life and have a bad day! She somehow always pulls me back from the proverbial "edge" and gives me the perspective that I am lacking. Wow! What a great Mom!!

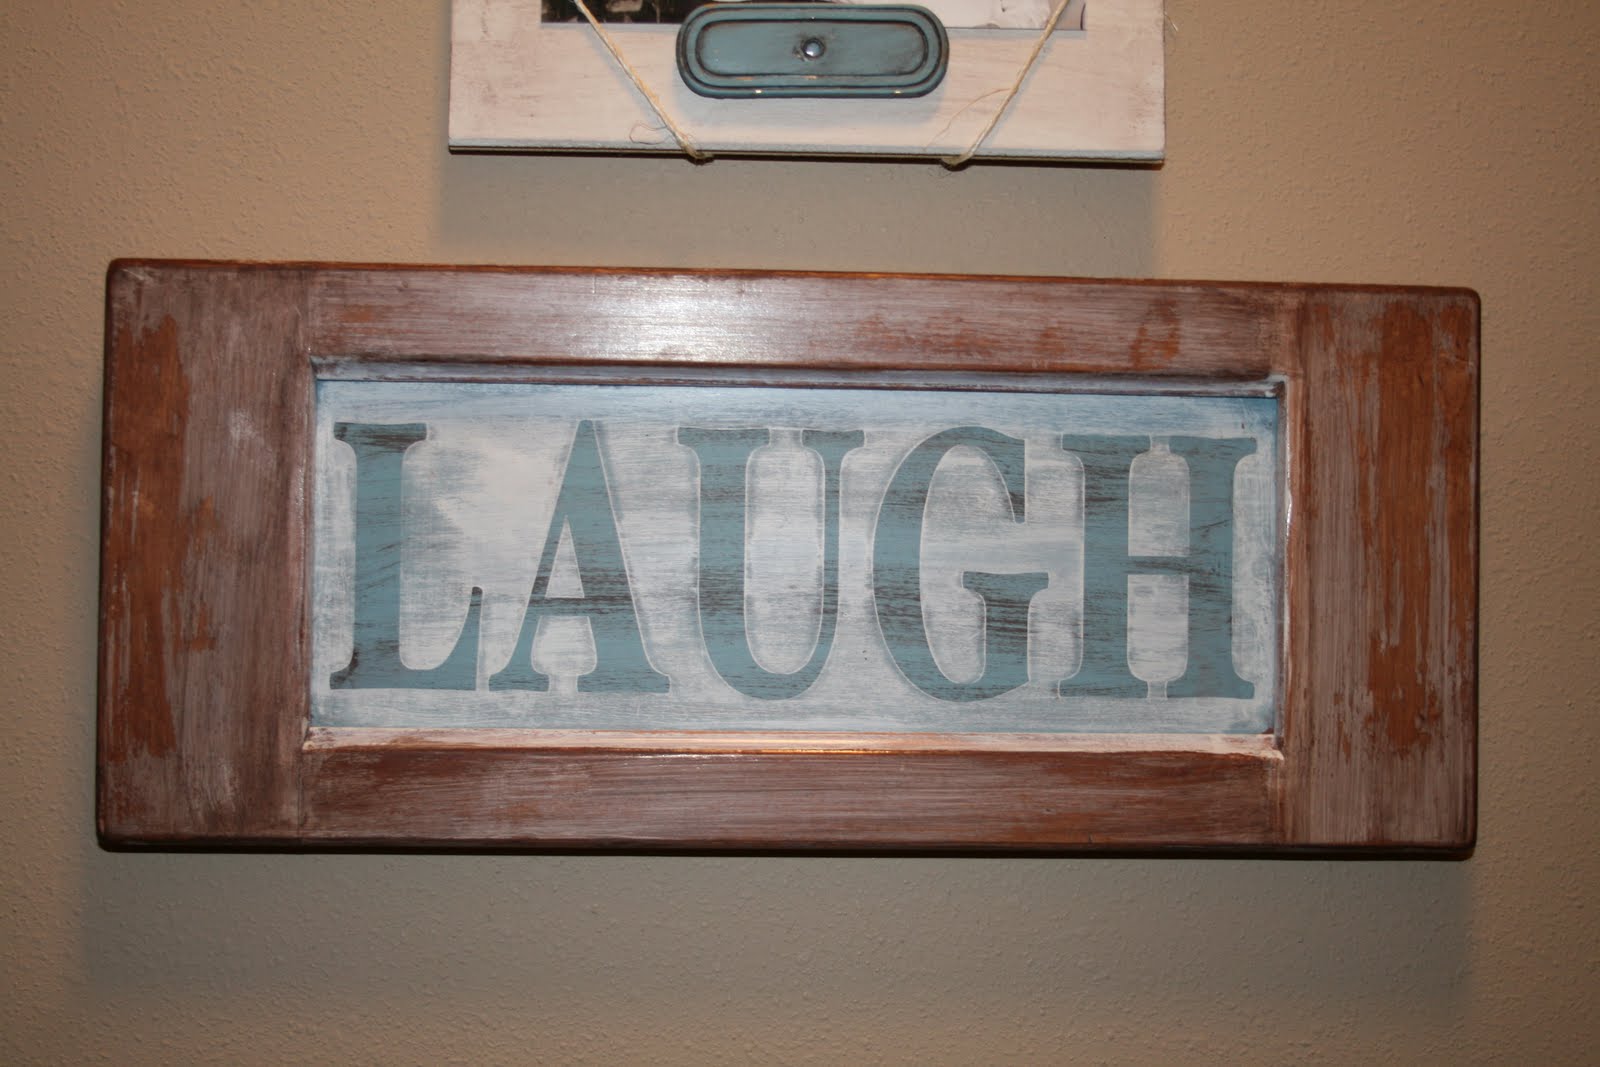
So this is for her. And I hope she loves it!

Before vinyl, after spray paint:


I decided what I wanted it to say and I created a two color design. I used my handy Silhouette to cut out the vinyl design.


Up Words & On Words work in action!
(yep, it's kind of messy! I had a lot going on.)

After preparing the lettering and design, I applied it to the canvas. Because working with canvas and vinyl can be mildly mostly frustrating, I rubbed the application tape with a warm damp rag. This allows the application tape to let go of the lettering/design a lot easier.

I am always hesitant to work with vinyl/canvas combinations but for some reason-->I get an idea and push forward!

I'm so glad I did.

Let Go and Let God
canvas:


 Whatta ya think??

Click the links to view these great parties!
Hookin Up With HoH @ House of Hepworth's:
Whassup Wednesday @ Elements Interiors:
Transformation Thursday @ The Shabby Chic Cottage:
VIP Party @ Designer Garden:
SNS #79 @ Funky Junk Interiors:
Motivate Me Monday @ Keep It Simple
Amaze Me Monday @ Dittle Dattle:
Wednesday:
Thursday:
Catch a Glimpse Party @ A Glimpse Inside
Transformation Thursday @ The Shabby Chic Cottage
The Lettered Cottage

Thanks for stopping by Redefining C~follow me and add to the fun!

Carri

Wednesday, April 27, 2011

Vinyl Embellished Tile

I had a customer request this custom order so I decided I would blog about it! YAY...good idea. oh YEAH! (super original huh?)

She needed a housewarming gift for her who is younger and single. Hmm...once we got to talking a lot of gifts are geared towards couples, family and so on when trying to find a housewarming gift. So we decided something about friendship suited her friend the best!

I don't have before pic. Oops! See what happens when you get busy creating! But I used a neutral toned ceramic tile found at Lowe's.
I created a custom Up Words & On Words vinyl design and cut it using my large vinyl plotter. Unfortunately~the Silhouette only cuts 8.5" wide so it's just easier to create one 11" by 11" piece and use my larger cutter when using all one color. I design and create A LOT of tile similar to this. It really isn't a new idea. But each one turns out uniquely it's own!

So here it is:


Because the tile is so heavy, I suggest displaying it with a plate stand. But~I have been asked numerous times how they can be hung on the wall. I have created tiles to hang on the wall. I use modge podge  on the back and applied a cork backing. You can sandwich a ribbon in between or use adhesive backed metal hooks and apply those directly to the cork.

Here are a few other tiles I have created designs for:


And of course...I can't find the pictures I was looking for so these few will have to do!

Stop by these awesome blogs and Party!

Show & Tell Link Party @ Blue Cricket Design:
Hookin Up With HoH @ House of Hepworth's:
SNS #79 @ Funky Junk Interiors:
Motivate Me Monday @ Keep It Simple
Thanks for stopping by! Follow me for more fun projects!

Have a great day!
Carri


Tuesday, April 26, 2011

ReStore find...memory board

My Mom and I were cruising through our local ReStore last week looking for some inspiration. I can tell you one thing...I have a new found love of cabinet doors, hardware, random wood pieces, old windows, and shutter style closet doors thanks to the ReStore. I think they are getting to know me there! =)

I stumbled upon  some light weight rectangular wood something or others. I know it! I just pulled out all the stops on the technical portion of this explanation huh??? And there were several of these diamonds in the rough. I mulled it over. AND left them. Didn't buy a single one. Even though I knew I could come up with some way to use them, redefine them, breathe some life into them, give 'em a purpose! Ok...I went back the next day and bought 6! I'm gonna need to get creative!

I finished 1 yesterday.
Here is what it looked like BEFORE:
hmmm...This picture didn't turn out so well! I will have to take another when the sun comes out! :(
Anyhow~It kind of looks like a lattice panel. And it could be. I'm not real sure what it was used for.

Ok. Here is what I did. I sanded it down and wiped away the dust. I gave it two coats of Krylon's Dover White spray paint. YAY! Spray paint!!
I sanded to add a worn distressed look. I rubbed it with Walnut Distress Ink. Rub on-rub off. Kind of a silly little game. ;)

Then I added a few personal touches. I soooo want to add more but that will come at a later time. I used what I already have. YAY! Me.

I used burlap, scrapbook paper, metal clips, mini clothes pins, a chip board K and personal photos. I used push pins to attach everything to the back. You could use glue, staples...etc.

This thing is BIG!!! 5 1/2 feet long by 26" tall. LOTS o' ROOM to get creative with. And in due time...it will be completed. But for now~>I kind of like the simpleness of it.

HERE it is now:


I'm thinking it needs some chicken wire, cork, fabric, many some Up Words & On Words vinyl lettering. Some more color for sure! I have 5 more to get it figured out.

What do you think?? Help a sista out with some ideas and inspiration!

Thanks for stopping by! Follow Me and join the fun!
Find on me on Facebook @:
or Visit my Esty shop @:

Check out the great link parties hosted at these awesome blogs!
Tuesday:
Homemade Projects @ Tip Junkie:
Wednesday:
Hookin Up With HoH @ House of Hepworth's:
SNS #79 @ Funky Junk Interiors:
Motivate Me Monday @ Keep It Simple

Have a great day!
Carri


Monday, April 25, 2011

Cabinet Door Chalkboard

Finally! I have completed a project to post. Was it hard? No. Time consuming? No. Have we all been sick? Yes! Has the weather been crap? Yes! Did my computer have major issues? Yes! Does it feel like the stars have all aligned against me? Yes!
BUT~~>here I am. Still standing and ready to post my latest project.

I started with a cabinet door & yes, I forgot to take a pic of it before I started. But here is what it looked like after several coats of spray chalkboard paint on it:

(craptastic pic-sweet!)

(lil more real)

FIRST: I taped off the "border" and spray painted the center with several coats of chalkboard paint
When it was dry, I mixed some paint colors to get a dark grey. I put two coats of dark grey on the border. Once that was dry, I mixed some more paint to create a green'ish' color. I brushed it on lightly and let dry. Once dry, I gave it a very light sanding and distressed with Black Soot Distress Ink.
I spray painted a silver drawer pull a green called Fern and added it to the chalkboard with two black screws.

And HERE it is:


Find me at the party and check out these other great blogs!
Monday:
Market Yourself Monday @ Sumo's Sweet Stuff:
Motivate Me Monday @ Keeping It Simple:
Paint Projects Link Party @ Centsational Girl:

Tuesday:
Homemade Projects @ Tip Junkie:
SNS #79 @ Funky Junk Interiors:
Amaze Me Monday @ Dittle Dattle:
Get Your Craft On @ Today's Creative Blog

The Lettered Cottage


Thanks for stopping by! Follow me and join the fun!
You can also find me on Facebook @
Or view my Etsy Shop @

Have a great day!
Carri

Sunday, April 24, 2011

Happy Easter! Hello Sunshine!

Oh my goodness! What a beautiful day!! Not only is it Easter (an amazing celebration in it's own right) BUT it's also 60* outside. Bow Chika WoW wOw! We have been outside nearly all day. Our boys have yucky coughs so we didn't get to celebrate Easter in our traditional way. However...we are home ALL together on a wonderful day. Couldn't ask for much more than that.
Oh~~>except some spray paint therapy.

Oh YEAH! I have 4 projects painted and basking in the glorious sunshine. 3 will be similar to projects I have done before but 1 will be all new to me! (not necessarily new to blog land though)
Gotta love the Habitat for Humanity ReStore.

Now, I wish I could say that the weather is going to stay nice enough to bust out some more DIY spray painted projects BUT...my guess is as 50/50 as the weatherman's.

So for now...have a Happy Easter
and be looking for my redefined projects this week!

Have a great day!
Carri

Friday, April 22, 2011

:( Stinkin' Technology ):

My computer has been acting strange lately. So today, my Mr's Uncle is taking a look at it for me! I hope to be up and running soon! Thankfully my Mr's laptop is working so I can at least reach out to the world while in waiting.

May you all have a blessed Easter!

Have a great day!
Carri

Tuesday, April 19, 2011

LAUGH sign

Arrrg! We woke up to a blanket of white fluffy wrath from Mother Nature. Snow! If April showers bring May flowers what does April snow bring?? BIG BIG bell peppers?? LOL. Let's hope! I can't lie, I am tired of the snow and tired of the cold. Being sick hasn't helped my attitude towards Mother Nature's inconsistent, NON-funny antics. Makes it hard to spray paint darn it! It's spray paint season...winter should be over!!

Alrighty then...I suppose I should build a bridge and get over it. Can't control it and I certainly can't change it. In yesterday's post I revealed a LAUGH sign as part of my DIY wall decor so here is how I did it.

I started with a cabinet drawer door:

approximately 15" long by 6" tall

I painted the center with a blue mixture that I made by adding all kinds of whatever colors I had. Very professionally done! =)


I used Burnt Umber craft paint and dry brushed over the blue. And added a few brush strokes to the wood as well.

I created LAUGH and cut it in brown vinyl using my Silhouette. Since I was using LAUGH as a stencil, I also cut LIVE and LOVE to go vertically on each end piece. I had planned to use those words in vinyl form to create some texture. But I decided not to use them in the end. They can always be added.

I transferred laugh using transfer tape. I "eye"balled the placement. I usually am a stickler on measure, measure, measure but I didn't this time. Sometimes ya just know. ;)

I used a warm damp rag and rubbed it across the transfer tape. This helps release the transfer tape. I removed the transfer tape. And added a light coat of SW's Divine White. I then peeled the vinyl lettering off.


See the blue with subtle streaks of brown??
LOVE.

I lightly sanded it and had intended to "stain" it using a mixture of Burnt Umber and water. That didn't work so well. When I went to rub it off...it took the DW paint with it. :( Oh well. Improvise right?? So I got out some Minwax Bombay Mahogany stain and wiped it on and off. I'm not so sure I like how it turned out though. It can always be sanded and re-painted! =)
 
And here is how it turned out:


Still not real sure I like the outer part, wood color and all. But it will work for now!

Stop by these blogs today!
Tuesday:
Handmade Projects @ Tip Junkie:
Running With Glitter Link Party @ Running With Glitter:
Tuesday Glam Party @ Giggles, Glitz & Glam:
Anything Goes Party @ Type A Decorating:
Wednesday:
Whassup Party @ Elements Interiors
Saturday:
SNS #79 @ Funky Junk Interiors:
Thanks for stopping by! Have a great day!
Be sure to follow me and see what's to come!

Carri

Monday, April 18, 2011

Hallway Wall Decor

I was sick for the best part of last week. And most of the weekend. I DID get to watch an awesome Nascar finish where #29 took 5th! Outstanding job by Kevin Harvick.

I don't know how much more of this winter stuff I can take. I am tired of snow, cold and sickness. Needless to say I didn't accomplish too much. I did get a few things done BUT they were just small projects all going in the same place. =)

I Used:
wainscoting scraps from the garage, some dollar store frames, some twine, some burlap, push pins, two oblong metal pieces, paint, a few pictures, and velcro.
(I will post about the LAUGH sign tomorrow)

I took wainscoting scraps left over from my coffee order board
and glued them together with Gorilla wood glue. They were tongue and groove pieces so I sanded the tongue edge off. I painted them SW's Divine White and dry brushed them with Burnt Umber craft paint.

I painted 2 Dollar store frames a blue that I mixed using lots of whatever I had at the time. And sanded them for a distressed look. I also painted 2 decorative metal pieces with the same blue. I got 3 pictures of my boys and added them to the 2 frames and one on to the front of one piece of wainscoting. I used velcro circles to adhere the metal pieces on and twine to help hold the picture. 

I used velcro circles and placed two on the back of each frame and the other side of velcro to the wainscoting pieces. I velcro'd (sp, lol) the frames to the wainscoting background. Then, I hung them all using strips of burlap and push pins.  


HERE is how it turned out:


Coming tomorrow:
the LAUGH sign

Monday:
Amaze Me Monday @ Dittle Dattle:
Motivate Me Monday @ Keeping It Simple:
DIY Project Parade @ The DIY Show Off:
Mad Skills Link Party @ Mad in Crafts:
Tuesday:
Handmade Projects @ Tip Junkie:
Running With Glitter Link Party @ Running With Glitter:
Tuesday Glam Party @ Giggles, Glitz & Glam:
Anything Goes Party @ Type A Decorating:
Wednesday:
Whassup Party @ Elements Interiors


Follow me for more fun!
Thanks for stopping by! Have a great day!
Carri

Thursday, April 14, 2011

Burlap backed Breathe frame

A customer contacted me via my Etsy shop http://www.upwordsandonwords.etsy.com/ and asked if I could make an item in a different color.
She loved this frame, saying and idea
but preferred it in red:
So, doing what I did here:
(with the exception of having two pieces of glass, this project's frame only had one piece so all the vinyl was placed on the front rather than layered and I used spray paint instead of hand painted.)

I created it again only in true red.
*you will notice that they are marked Up Words & On Words copyright 2011-Up Words & On Words is my vinyl business that I run from home and can be found on both Etsy and Facebook*

And here is how it turned out:


I don't have anything red...or turquoise
so it's a toss up as to which I like better.
Either way, I love the burlap rosettes!

Partying @ the Following:
SNS #77 @ Funky Junk Interiors:

Monday:
Amaze Me Monday @ Dittle Dattle:
Motivate Me Monday @ Keeping It Simple:
DIY Project Parade @ The DIY Show Off:
Mad Skills Link Party @ Mad in Crafts:
Tuesday:
Handmade Projects @ Tip Junkie:
Running With Glitter Link Party @ Running With Glitter:
Tuesday Glam Party @ Giggles, Glitz & Glam:
Anything Goes Party @ Type A Decorating:
Wednesday:
Whassup Party @ Elements Interiors
Sunday:
Creative Bloggers' Party & Hop @ Homemaker on a Dime
Thanks for stopping by! Follow me and join the fun
 I'm having 'round here!

Have a great day!
Carri
*~*~*~*~

Wednesday, April 13, 2011

Dining Room Clock Redo

Awhile ago...pre-blog...I redid my dining room clock. At first I didn't want to change it because it was a Christmas gift from my wonderful Mother in Law a few years ago. But then, our oldest son started kindergarten and started asking a lot of questions about the clock and the time and so on. It's kind of hard to teach them about telling time when the clock face is in Roman Numerals. I began looking for a new clock. Long story short~too expensive! Especially since I already had the kind of clock I needed and wanted! So I decided I'd brave it, redo it and use vinyl for the numbers.

 BEFORE:


It had a faux crackle face with a yellow tint and numbers in black. It was attached to a full circle metal frame.

I removed all the screws and took the frame off. I then took the clock hands off. I thought that part would be easy peasy lemon squeezy BUT it was probably the most time consuming task of the whole project! It isn't easy to find a thin (maybe even super thin) tiny wrench to get in under there and take it a part.
Whew! Taken a part. Let's begin. =)
I sanded and sanded and sanded some more. The faux crackle didn't want to come off. So finally I decided that whatever was left would just add texture.  I left it. I wish now I wouldn't have tried sooo hard to get it off and would have left a little more. Anyway done.
I primed it. Then added two coats of Merlot and a coat of Bittersweet when the Merlot was dry. I sanded it lightly to blend/mix the two colors. Then I gave it a SW's Divine White topcoat and sanded again.

I created clear big numbers in my software. Then used my Silhouette to cut out my Up Words & On Words dark brown vinyl numbers.
I applied application tape to the numbers and worked with the positioning of the numbers until I was happy. Now mind you...perfect and happy are different. lol But, I tried.
I put the hands back on...again~not an easy task.
I did not put it back on the metal frame. I am betting that metal frame will find it's way into another project!
Added a saw tooth hook to the back and
 enlisted my SUPER Mr. to help me hang it up. What a swell fella! =)

And here it is
NOW:

(if you tilt your head slightly, the 3 won't look crooked)
Aside from the 3 the numbers turned out pretty good. And one of these fine days when I am cutting designs in dark brown, I will remember to make another 3 and do a swap-a-rooskie!

I actually really like it. That's not to say I {LOVE} it and I won't ever redefine it though! lol

Partying @ The Following:
Wednesday:
Show and Tell Linking Pary @ Blue Cricket Design:
Whassup Wednesday @ Elements Interiors:
Saturday:
SNS #77 @ Funky Junk Interiors:
Thanks for stopping by! Have a great day!
Monday:
Amaze Me Monday @ Dittle Dattle:
Motivate Me Monday @ Keeping It Simple:
Mad Skills Link Party @ Mad in Crafts:
Tuesday:
Handmade Projects @ Tip Junkie:
Running With Glitter Link Party @ Running With Glitter:
Tuesday Glam Party @ Giggles, Glitz & Glam:
Anything Goes Party @ Type A Decorating:

Carri
*~*~*~*~


Tuesday, April 12, 2011

Corner Stand & Shuttered Mirror Redefined

~Sorry I missed all of you yesterday! I have been sick with a head cold and since last Friday I haven't felt well at all. Sunday I took enough Advil to get me going. My best friend and I attended the Elton John concert. It was pretty awesome. Whether you're a fan or not...that guy can play the piano like a ROCK STAR.

Ok so last week, I posted a few pictures of what I am working on. I have finished them both with the exception of getting the shutter hinged back together. eee gads!!!! I thought I would do something super cool and take them off and add new freshly painted ones. But-after it was too late to turn back-I learned I should have left well enough alone. :( "If it ain't broke don't fix it. Anyone remember that?? lol

Any how...here are before pictures of what I was working on:


My Mom's shuttered mirror.
AND:

My hubby's IKEA corner stand that I "borrowed" from the garage. =)

Here is the shutter NOW, without the hinges,
which I am now procrastinating putting back on:


I spray painted the shutters dark brown and dry brushed them with SW's Divine White. I taped off the mirrors because they are glued in. :( And 'hand' painted the center SW's Divine White and dry brushed with Burnt Umber craft paint.
It's gonna be sooo suuuuuper cute when I actually get it ALL back together! I really should buck up and get 'er done. :-\

AND here is the corner stand:


I spray painted it Khaki and then covered that with Dove White. I was hoping to pull some of the Khaki when I sanded it but it sort of went straight to the previous coat of burgundy. :( That's ok. I improvised and swiped Eddie Bauer Bittersweet all over it haphazardly. Then I sanded it again lightly. It didn't turn out exactly as I had planned. But, it turned out just how it was suppose to I guess. Still, I am pretty darn happy with it! And it looks pretty good in the corner by my bay window full of my redefined items. ;)

Please feel free to stop by my Facebook pages:
Up Words & On Words:
(see: FOR SALE album for items for sale and check out my vinyl design albums too!)
http://www.facebook.com/pages/Up-Words-On-Words/291101592994
AND:
Redefining C:
(for blog updates and DIY fun!)
http://www.facebook.com/RedefiningC

Partying @ the following:
Tuesday:
Handmade Projects @ Tip Junkie
http://www.tipjunkie.com/handmade-projects-add-yours-5/
Wednesday:
Show and Tell Linking Pary @ Blue Cricket Design:

Ugh...now I'm off here. I sure hope I feel better tomorrow.
Thanks for stopping by! Have a great day!
Carri
*~*~*~*~*